Resources and support for livestock customers
Product inserts
Select, download, display, or print product inserts in multiple languages.
Certificates of Analysis
To receive a certificate of analysis for any of our IDEXX products, use this simple search tool.
MSDS
IDEXX (Material) Safety Data Sheets ([M]SDS) provide information about chemical substances in our products.
Billing & support
Learn about online billing, find answers to FAQs, or get customer service contact information.
Technical tips
IDEXX tests are manufactured in lots per strict quality standards. Lot approval by regulatory authorities, such as the USDA, is based upon the results of internal quality control testing for each. The certificate of analysis (C of A) for a test documents the performance of the test at the time of release testing. The performance data include the optical density (OD) values of the test controls and the calculated results and/or qualitative interpretation of a selected group of samples used during manufacturing. All these values must be within a specified range for the test lot to be approved for sale.
The OD values of the test controls do not need to remain within the C of A ranges during the lifetime of the test. Optical density values may change over time, without compromising test quality.
Diagnostic tests are composed of biological components that are not always stable when removed from their natural environment. Despite stabilizers used to control shelf life, most biological components lose some activity with time. When this occurs, OD values can decrease. The decrease in OD values of the test controls parallels the decrease of OD values in the tested samples, so the calculated results remain the same. Lower OD values than those on the C of A are acceptable so long as the validity specifications in the test insert are met for the assay.
The validity criteria in the insert differ from the values noted on the C of A. Validity criteria in the insert usually specify a limit on a control OD value or a ratio of control OD values. If a test plate performs within the validity specifications of the insert, then the test is working properly and the test results can be used.
The shelf life of an IDEXX diagnostic test can vary from 9 months to 2 years depending upon the product. The test is designed to give valid results throughout its shelf life.
With any ELISA, reproducibility and reliability depend on proper technique, equipment, environmental factors and attention to detail. The C of A serves as a guideline for anticipated test performance.
- The IDEXX Porcine Reproductive and Respiratory Syndrome (PRRS) Oral Fluids Ab Test is easy to run; however, please keep the following in mind regarding sample collection and handling.
- Samples of oral fluids can be collected from individual pigs or from groups of pigs in pens using ropes that are hung at pig shoulder height.
- Ropes should remain in the pens for 20–30 minutes to ensure adequate exposure.
- Insert the wet end of the rope into a clean plastic boot or bag.
- Strip the rope so the fluid accumulates in the corner of the bag or flows into the tube, if the tube is connected to the bag.
- Cut a corner of the plastic bag and drain fluids into the collection tube. If using a bag with a connected tube, then disconnect the tube.
- A minimum sample of 2.5 mL is recommended. Make sure that collection tubes do not contain additives such as EDTA or heparin. If using glass blood collection tubes, use only red-top tubes (without additives).
- Discard all ropes after collection. Never reuse ropes, plastic bags or collection tubes. Never leave ropes in the pens after sampling is finished. Do not pool oral fluids samples from ropes in different pens.
- Be sure all tubes are tightly sealed and packaged with ice before shipping. Overnight delivery is preferred, as it ensures timely arrival of chilled samples for best results.
- If the oral fluid sample contains particulate from the mouths of the animals, the sample can be centrifuged at 2500g for 5–10 minutes before use.
Visit the idexx.com/prrs to view an informative video.
Sample quality and handling
- The assay can be run on whole or skim milk samples and samples that have been exposed to heat treatment (during milk component analysis).
- Bronopol or a similar preservative may be used to maintain sample quality—this will not affect test results.
- Samples should be mixed gently prior to pipetting.
- Poor quality samples may compromise the accuracy of test results. Prior to testing, milk samples should be checked to ensure that they are not soured or separated and are free from contamination.
- Care should be taken to minimize the likelihood of milk carryover from cow to cow during sample collection, particularly when using samples collected for routine herd recording.
Incubation
- Use adhesive covers as specified during sample, detector and conjugate incubation steps. Adhesive plate covers validated for use with this test can be purchased from IDEXX. Ask your local sales or customer service representative for details.
- Use of a plate shaker incubator is needed. Please reference the test insert for rotation and temperature specifications or ask your local sales representative for more details.
Washing
- The assay requires 4–5 washes at each wash step during the assay protocol.
- Washing with good quality water and a clean and maintained washer is crucial.
- IDEXX can provide specific wash settings to be used for the Alertys Milk Pregnancy Test. Please ask your LPD Technical Services representative for details.
IDEXX ELISA test kits are designed to work as a set of reagents. However, generic components, such as substrate, wash, and stop solutions can be mixed within kits having the same part number. Other reagents such as kit controls, conjugates and plates have been optimized to work together for that kit lot/batch. Should you have any questions on generic components or what can be used across kits, please contact your LPD Technical Services representative.
Mixing samples before plating is a very important step when running an ELISA test. Samples that are not mixed well will produce variable results.
Frozen samples can be thawed at room temperature or in a refrigerator. All thawed samples need to be thoroughly mixed prior to dilution to ensure that the proteins are dispersed throughout the sample. Mix by gentle vortexing or inverting at least five times. Frothing or overmixing of samples will cause denaturation of serum proteins.
Prepared dilutions, especially the 1:500 in poultry kits, also require mixing with gentle vortexing or a pipette set at a volume of 100 µl or greater prior to plating. Mixing the diluted sample with a micropipette, such as the one utilized for transferring the 1 µl of sample, is not appropriate as the volume exchanged is not enough to thoroughly mix the sample.
Careful pipetting is crucial in obtaining accurate test results when performing any ELISA test. Sometimes air, resulting in bubbles, can be drawn into the pipette or dispensed into the wells. If this happens, bubbles can influence optical density values and results. To minimize or eliminate this problem, reverse pipetting is recommended for the addition of reagents to the ELISA plate.
Reverse pipetting with a multichannel pipette:
- Put new tips on the pipette, ensuring they are on tight and straight.
- Press the plunger past the first stop and halfway to the second stop.
- Draw the liquid in a slow motion, being careful that no air bubbles are drawn into the tip. Check for consistency of volume in the tips.
- Touch the tips to the edge of the reagent reservoir to remove excess liquid on the outside of the tips.
- If the wells on your plate are empty, position the tips into the lower corner of the wells.
- If the wells on your plate contain liquid, position the tips above the liquid.
- Slowly dispense the liquid into the wells by depressing the plunger to the first stop. Be careful not to splash liquid out of the wells, and make sure there are no drops left on the tips.
- To repeat, hold the plunger at the first stop and continue with step 3.
- Eject the tips into an appropriate waste container.
Note: Reverse pipetting uses more reagent/volume (="dead volume").
Troubleshooting
High background or excessive color development
Insufficient color development
Poor reproducibility plate to plate
Replicates within plate show poor reproducibility
IDEXX ELISA screening assays are used to screen populations representing herds or flocks. Some negative populations may present with a higher number than expected rate of positives. Unexpected positives generated using any screening assay should be confirmed using an alternate confirmatory method appropriate for the test, such as Hemagglutination Inhibition (HI), quantitative polymerase chain reaction (qPCR), virus isolation (VI), etc.
Testing with IDEXX test kits
ELISA is divided into three main formats: indirect, blocking (competitive) and antigen-capture (direct).
Indirect Format
In the indirect format, the sample antibody is sandwiched between the antigen coated on the plate and an enzyme-labeled, antispecies globulin conjugate. The addition of an enzyme substrate-chromogen reagent causes color to develop. This color is directly proportional to the amount of bound sample antibody. The more antibody present in the sample, the stronger the color development in the test well. This format is suitable for determining total antibody level in samples (Johne’s, etc.).
Blocking (Competitive) Format
In this format, the specific sample antibodies compete with, or block, the enzyme-labeled, specific antibody in the conjugate. The addition of an enzyme substrate-chromogen reagent causes color to develop. This color is inversely proportional to the amount of bound sample antibody. The more antibodies present in the sample, the less color development in the test well (CAV, etc.).
Antigen–Capture (Direct) Format
The antigen in the sample is sandwiched between antibodies coated on the plate and an enzyme-labeled conjugate. The antibody conjugate can be either monoclonal or polyclonal. The addition of an enzyme substrate-chromogen reagent causes color to develop. This color is directly proportional to the amount of the target antigen present in the samples (LLAg, etc.).
IDEXX has some ELISA assays that use a dual-well format. Dual-well assays require two wells to be used for each sample. One well is coated with virus antigen and the other well is coated with NHC antigens, which are derived from noninfected cells.
The NHC well is used to assess the extent of normal host cell contribution to the total signal by relating the reactivity in the viral antigen well to the reactivity in the NHC well. If the NHC well was not present, any nonspecific reactivity in the antigen well could result in a false-positive.
After subtracting the NHC signal from the antigen signal, you will be left with signal directly related to the presence of antibodies. One then follows the specific insert interpretation to classify the result as positive or negative.
Yes. Milk samples with common preservatives, such as Bronopol and sodium azide, can be used in IDEXX milk tests with no adverse effects. Always review the test insert for detailed sample requirements.
Many Dairy Herd Information Association laboratories use a low-temperature heat treatment. Comparisons of tests performed with both heat-treated and non-heat-treated samples show no significant difference in performance. Always review the test insert for detailed sample requirements.
Whole-milk samples can be used after centrifugation for 15 minutes at 2000 xg, or after overnight refrigeration at 2ºC–8ºC. The sample should be drawn from below the cream layer. This sampling practice can vary around the globe, with some regions thoroughly mixing the whole milk and then drawing the sample. Refer to the test insert to determine whether the test has any restrictions when using whole-milk samples. Always review the test insert for detailed sample requirements.
Curdled or sour milk should not be used. The matrix is difficult to pipette, and any residue left after washing may cause false-positive results. Always review the test insert for detailed sample requirements.
Unless the test kit insert states that testing is for multiple species or different sample types, IDEXX does not have that specific claim and cannot stand behind results obtained from off-insert testing. To have a specific claim, we need to have supporting data and approval by different governing bodies. Often during the development process, alternate sample types or species are not evaluated, so we are unable to make those claims in our insert. When in doubt, check your test kit insert or call your local IDEXX representative.
IDEXX stands behind the results generated until the test kit expiration date is reached. Use of a test after the expiration date is not advised, even if the individual components making up the test kit may not yet have expired. Due to government regulations and for quality control purposes, we must abide by the expiration date on the test kit box.
Initially, several lots of individual components making up a test kit are tested individually to see performance over the long term. From this multiple-lot testing, the component is given a certain expiration date. Then, to determine the expiration date of the kit, there is multiple-lot testing on the entire kit. This testing may show good performance past, for example a 12-month expiration date, but to ensure the highest quality product throughout the life of the test kit, we may not give it the additional dating noted by the other components. Lastly, we are regulated on a kit-by-kit basis by our outline of productions with agencies, such as the USDA, which specifies the allowable expiration dates for each kit.
The kit insert specifies the wavelength required for an assay. Most assays specify the absorbance reading at 450 nm or 650 nm. Other filters can be used, but will result in lower optical density (OD) values. The use of 630-nm or 620-nm filter instead of a 650nm filter will lower the OD values of both the controls and samples, but will do so equivalently across the entire plate. The use of these alternative filters will not affect the test results.
Small-volume testing can produce a strain on some reagents. In these situations, it is recommended to portion out plate strips into other sealed bags with a desiccant, or aliquot the conjugate into small vessels for use. Keep the unused vessels or plates in the refrigerator and take out only what is needed for each day’s testing. Be sure to label all bags and vials with the reagent part and batch number, as well as the test kit name its corresponding batch number.
Follow these steps to download a certificate of analysis for an IDEXX test kit:
In a web browser, go to https://www.idexx.com/livestock-poultry/certificates-of-analysis.html.
Enter the lot number of the text kit. This is found on the outer kit label on the box.
Select Request Certificate.
Click on the test kit name to open the pdf file. You can then save the certificate to a location of your choice, or print it.
Follow these steps to download an MSDS for an IDEXX test kit:
- In a web browser, go to https://www.idexx.com/corporate/common/msds.html.
- Select the Product Family and Language.
- Enter the product name or part number.
- Click Find (M)SDS; a list of matching MSDS pdf files will be displayed.
- Click on the test kit name to open the pdf file. You can then save the sheet to a location of your choice, or print it.
IDEXX SNAP Beta-Lactam (NBL) Test Kit: Changes to shipping conditions and approval for goat milk
Software
It is good laboratory practice to periodically test the calibration of your microplate reader. IDEXX checks the calibration of its readers using calibration test plates, which can be purchased from most reader manufacturers or from laboratory equipment providers.
Important: The calibration plate must be calibrated for the wavelength you normally use for testing (e.g., 630 nm, 650 nm, 450 nm). The calibration can be performed by the manufacturer of the calibration plate.
Use the following steps to run a calibration test plate and to print the results:
- Start the xChekPlus® software and log on.
- Turn on the plate reader, and place the calibration plate in the holder.
- From the File menu, select Template. Create a template for an assay you normally use, with a case name of your choosing and a count of 96. Save the template.
- From the File menu, select Read.
- Choose the assay and template you just created.
- After the data is displayed, you may save it (using the save icon), and/or print it (using the print icon).
- Using the printout, compare the optical density (OD) values for specific wells to the OD values on the calibration plate test card for the wavelength used.
The Total Counts Report provides the number of negative, positive, suspect, and total number of samples for each case selected. It also gives you a grand total for each category for all the cases selected. When creating the report, you can select the assay as well as the date range. The Total Counts Report allows a variety of uses. You may want to use it to determine a percentage of positive samples when testing presumed negative flocks or herds. You can also use the report to determine monthly or quarterly sample tallies for testing in your lab.
To run a total counts report from xChekPlus:
- Choose Reports > Total Counts from the menu bar.
- In the Total Counts dialog box, choose the assay and the data range (or leave the date range open to select all cases).
Note: You can also select the spreadsheet option if you want to save the data as a Microsoft® Excel spreadsheet.
When running ELISAs, a good measure of test performance is the reproducibility of the positive and negative control. xChekPlus software offers a report that displays not only data on the control replicates, but also control tracking over time.
It is important to review control data often to ensure that values are not trending or exhibiting excess variability. Control values for a specific lot should be similar on a run-to-run basis.
To run a control tracking report from xChekPlus:
- Click on Reports > Control Tracking Report.
- Highlight the test, specify a date, choose graphing options and check by well (% diff) > OK.
- A control tracking report will be displayed that can be saved and/or printed and then evaluated.
Note: We recommend that the difference between control replicates be no greater than 20%.
A key component of the control tracking report is that it can display the lot number of the kit being used and represented in the control tracking report. This is useful information when evaluating quality control data. If you currently do not track the kit lot, it can be entered into the software in two ways: either through database > assays, or in plate view at the time that you are reading your plate.
If you are seeing poor control reproducibility, it may be an indication that your pipettes are not functioning properly, your wash system is malfunctioning, or you have poor distribution of antibodies in your samples.
The xChekPlus software does allow the user to customize reports to show the laboratory name. Choose Options > Report Configuration. The Header tab gives you four lines on which to place your laboratory’s name and address. Once you enter your laboratory’s information here, it will always be seen on saved and printed xChekPlus reports.
When creating an Analyze Case Report, the final screen that appears before the report is generated (the Analyze Cases Report - Options dialog box) allows you to choose your case and graph options. On the right-hand side is the Variables button. Click the Variables button to see a list of variables that can be shown on the report. Check the box next to the variable you want to display on the report, such as “Calendar Age.” You will also see the Variables button in other screens when creating other reports, and in Plate View after reading a plate.
Follow these steps to change the orientation of the controls on a template for an assay:
- From the main screen, choose Database > Assays.
- Select the specific species and test.
- In the Manage Assays dialog box, on the right side, is Template; select the orientation you prefer from the dropdown list. This will now be the default orientation for the controls.
Kit lot numbers and expiration dates can be entered in two places in the xChekPlus software.
Lot number information can be entered in Plate View after reading your plate by double-clicking the Kit or Expiration Date field. Entering the information this way will apply it only to this data set.
By choosing Database > Assays and selecting the specific test, you can also enter the kit lot and expiration date information. If entered this way, the information will be applied to all testing until a new lot and expiration date are added.
Note: This information can be entered each time an assay is run or–if you will be running the same lot number for several tests in a row–it can be entered into the database assay information.
Instruments
Maintenance and calibration of all laboratory equipment is essential for accurate and reproducible results. Maintenance routines depend upon the amount of daily testing performed in your laboratory. Always refer to your equipment manufacturer’s guide for their recommendations. You can also contact your LPD Technical Service representative for any guidance/documentation on specific instruments and calibration plate availability for microtiter plate readers.
The plate washer plays a key role in achieving accurate, reproducible test results. Make sure your plate washer is adjusted properly. Change settings as needed so the washer meets these requirements:
- Buffer is dispensed gently, at approximately 200 μL/sec, with the tops of the aspiration pins level with the tops of the wells. Avoid bottom wash or similar modes. In bottom wash, the buffer is dispensed closer to the bottom of the wells, which increases the pressure on the well. There should be just enough pressure to clean the well.
- During aspiration, liquid is pulled from the surface of the wells, not from below or above. Synchronize the aspiration rate and the movement of the pins so that the pins always remain in contact with the liquid's surface as the level goes down. Use a high aspiration rate; the actual rate will vary depending on the washer. The aspiration pins should never be lower than 1 mm above the bottom of the wells.
Contact your local LPD Technical Services representative for any washer programming information available or any questions you may have.
Many IDEXX ELISA test kits require the use of a diluted wash buffer between incubation steps. To maintain a high level of ELISA test kit performance, keep these guidelines in mind when using wash solutions:
- Use high-quality distilled or deionized water to mix with the specified volume of a wash buffer concentrate.
- Consult the test kit’s insert to check the amount of wash buffer required to run each plate. The wash volume needed may vary depending upon the washer. Automated washers tend to use more wash buffer than manual washers because they need to be primed and then flushed after use.
IDEXX Technical Service washer maintenance: BioTek® 405™ LSR
IDEXX Technical Service washer maintenance: BioTek® 405™R
IDEXX Technical Service washer maintenance: BioTek® ELx50™―without valves
IDEXX Technical Service washer maintenance: BioTek® ELx50™―with valves
Sample collection
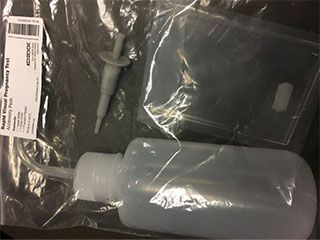
- 1 wash bottle
- 1 plate cover
- 1 precision pipette
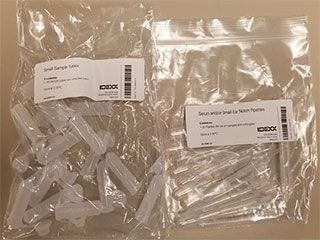
Serum or small ear notch
- 16 snap cap sample tubes
- 20 pipettes
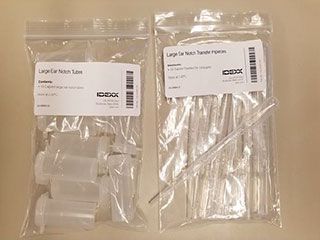
Large Ear Notch
- 10 capped large ear notch tubes
- 10 transfer pipettes
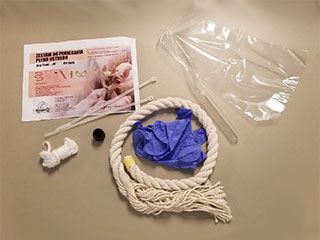
5-pack only includes:
- 5-ropes
- 5-Gloves
- 5-Zip ties
- 5-Bags with tubes
About IDEXX Livestock, Poultry, and Dairy technical services
If you have a question about the performance of an IDEXX test, your IDEXX representative requires certain information so that s/he can most efficiently assist you. Your answers to the questions such as these serve to quickly diagnose the performance issue:
- What is your company name and phone number?
- Which test kit are you using?
- What is the batch or serial number of the test kit?
- How many kits of the same batch or serial number do you have?
- What is the performance inquiry regarding? (e.g., unexpected results, invalid plate)
- Can you provide data to illustrate the problem?
- Have you used the kit more than once and, if so, was the same problem repeated?
When calling your representative with performance questions, please have relevant software version and test kit data available. This information helps us to quickly gather the information that we need. We appreciate your help in providing descriptive information and data that will help resolve your question quickly.
You may have noticed that after you contact LPD Technical Service, IDEXX sends a survey asking about your interaction with the LPD team. Here’s why: IDEXX is certified to ISO standards. Our continued ISO certification depends on monitoring the satisfaction of our customers.
We realize that many of you have close relationships with your LPD Technical Services representatives and readily communicate your needs to them, but it is important for us to hear from you through other means as well. That’s why we always send a follow-up survey after our customers contact IDEXX Technical Services.
If you receive an e-mail survey, please take a minute to answer the few questions about your recent experience with LPD Technical Services. Your feedback helps us provide the outstanding products, service and support that you expect from IDEXX.
Guide for importing OUS kits
Thank you for your interest in our IDEXX Diagnostic kits which ship from the Netherlands location. For shipping, we recommend using your own carrier account number (FedEx or DHL) as the charge will be a less, and the carrier will act as your broker at customs. Any duties or fees due at customs would be charged to this account as well. We can pre-pay and add the charges to the order also if you prefer. We only ship from Netherlands to the US Mon-Wed each week. Below you will find the manufacturer’s address for the permit application, and a link to the USDA website, please complete the APHIS 2005 application. For the port of entry, you can enter ‘Any US Port.’
Manufacturer’s Address see specific kit insert;
IDEXX Switzerland AG
Stationsstrasse 12
CH-3097 Liebefeld-Bern
Switzerland
Phone +41 31 970 62 60
Telefax +41 31 970 62 79
IDEXX Montpellier SAS
326, Rue de la Galera
Parc Euromedecine
34090 Montpellier
France