IDEXX Cornerstone Software
News and information
Your clients are very important, and the ones that earn the top ranks among your team and on your reports are especially so. Do you have these particular clients identified to quickly obtain a list of them to send out a holiday card or token of appreciation? Let’s show you reporting options to help you do that!
For those clients that deserve that little extra special attention, you can assign them to an alerting client classification. This will enable anyone working with the client to see this “badge of honor” and use reports that use client classification as a filter, such as the Client Master report, to get a list together in a few clicks.
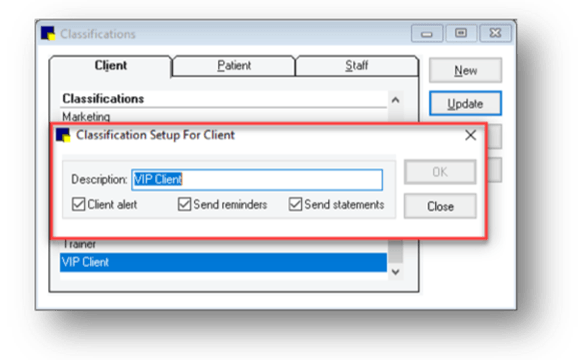
- Go to Controls > Classifications > Client (refer to Fig 1) to create the classification
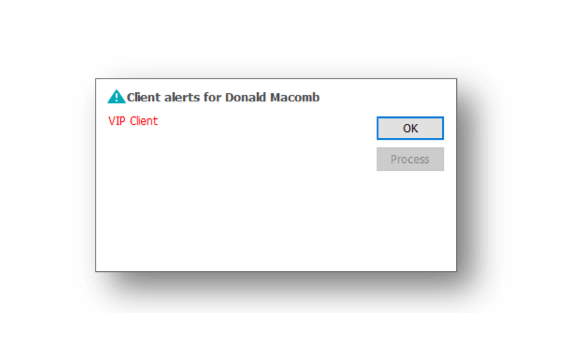
- Then update each client account accordingly. The alert will display when accessing the client (See Fig 2)

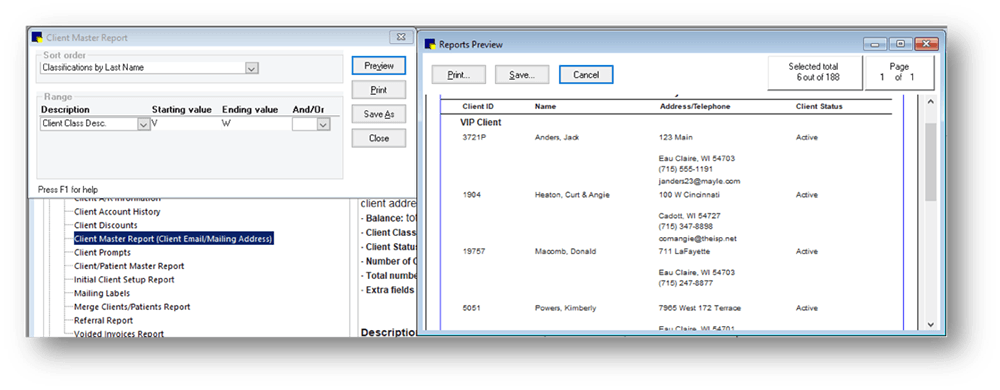
3. Once the classification is created and clients assigned to it, use the Client Master report (Reports > Client) to generate your special client list. When saved to file, the list will have the email address as well! Example below shows the report sorted by classification and name, with the range filter set to Client Class description.
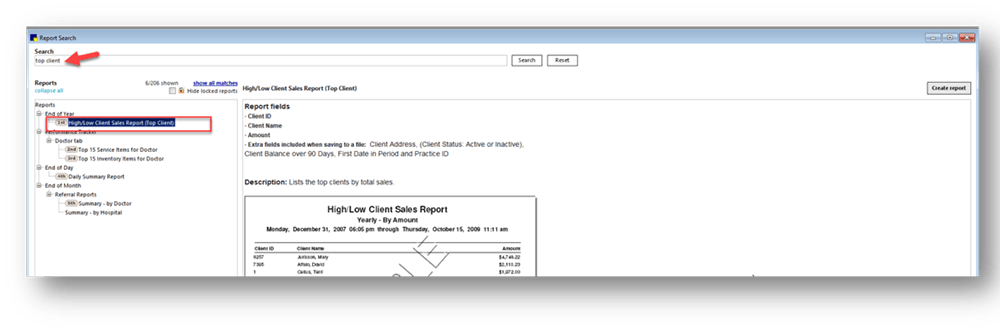
If you don’t want to segregate your clients in this manner, you can still quickly pull a list of your top clients by using the High/Low Client Sales report:
- Under the Reports menu, select Find a Report
- In the Search field, enter top client and click Search
- Select the High/Low Client Sales Report from the list on the left and click Create report
4. Select the Current period under Yearly periods and click Preview Tip: You can also select multiple sequential periods using the Shift key to see top client s for the past 2 or more years.
5. By default, all clients will list in order of highest to lowest in net sales for the time period(s) selected in the previous step. Use the Range filter if wanting to focus the list to those clients who spent a certain amount or more or list the top x clients like this:

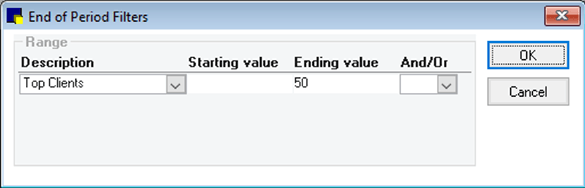
6. The report displays the client ID, Name and net sales for the selected time period. Save the report to file and view this snippet to learn how to mass merge this information into a Cornerstone document
To identify your top clients and efficiently create mailing labels in a single step, use the Client Patient Report Builder, also found under the Reports menu:
- From the Client and Patient Report Builder window, click New
- Enter a description in the Report name field
- From the List results in order of: drop down, select the order in which you want the information to appear on the report and print labels. Tip: To only have clients appear on the report, select the Show clients only checkbox
- On the Client tab, set appropriate criteria such as sales this and last year fields, credit code, classification, etc.
Tip: to exclude clients with past due balances, select Less than from the drop-down menu and enter 0.01 from the 90-over days field
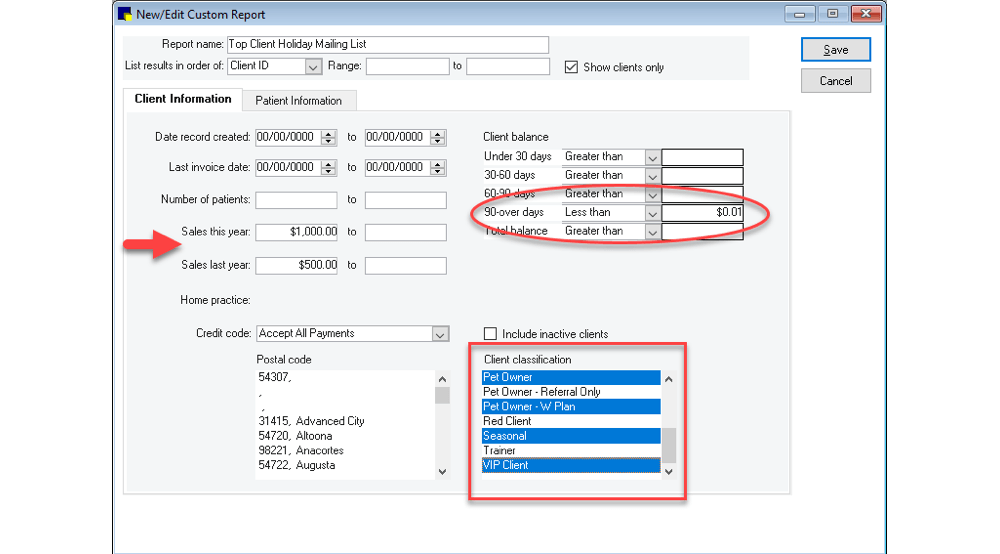
In this example, top clients will be listed in last name order, has sales of $500 or more for last year and $1000 or more for the current year, applied to specific classifications and excludes anyone with a balance over 90 days old.
5. Click Save
6. From the Client and Patient Report Builder window, select the report on the list and click Run
7. At the top of the report preview, the number of clients will appear on the upper right of the window. Click Print for the report or click Labels to print labels for the listed clients (formatted for Avery 5160 style labels).

You can also review the Holiday Mailing Labels snippet on the IDEXX Learning Center.
Wishing you, your teams and clients a healthy and happy holiday season!